「Netcode for GameObjects」の中でも特に強力なリレー機能のを使ってオンラインマルチプレイ機能を実装しましょう。リレー機能の基本から応用まで、ゲーム開発におけるマルチプレイヤー環境構築を一緒に学びましょう。その全てをわかりやすく、具体的な例を交えながら解説します。実際に動かすものに関しては、以前のNetcodeで作ったサンプルを利用しますので、こちらでプロジェクトを作ってから今回の記事をご確認ください。

Relay機能を実装する
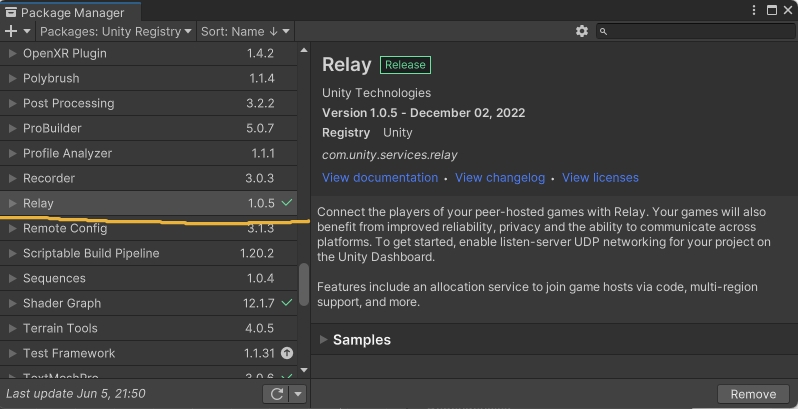
Relayパッケージを導入する
パッケージマネージャーを開いて、Relayを探してください。必要があればアップデートを行いつつ、インストールを行います。(下図はインストール済みのためRemoveボタンになっています)
Project設定を行う・Gaming Serivces
Edit>Project Settingを選択して、ウインドを表示します。Serviceタブを選択してください。以下、始めてプロジェクトを使う人と、既存のプロジェクトをお持ちの方で分岐します。
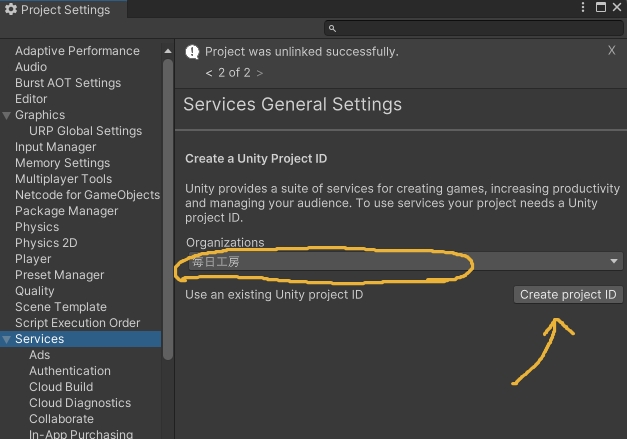
始めてプロジェクトを作る人
Organizationsから作る組織を選択します。個人の場合はUnityのアカウント名などを選択してください。選択すると[Create project ID]のボタンが押せるようになります。Create project IDボタンを押すと、Product Nameを元にUnity Service上にプロジェクトが作られます。
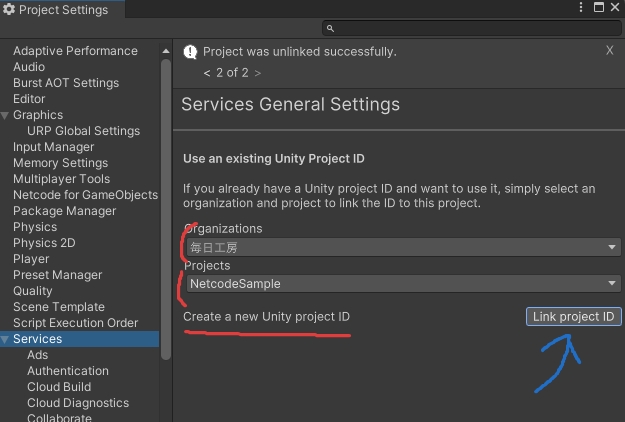
既存のプロジェクトを利用する場合
すでにService上にプロジェクトがあり、それを利用する場合は[Use an existing Unity project ID]から選択することができます。
Organizations > Projectsの順番に選択してください。2つを選択した状態で[Link project ID]ボタンからリンクさせてください。
UnityServiceでRelay機能を使えるようにする
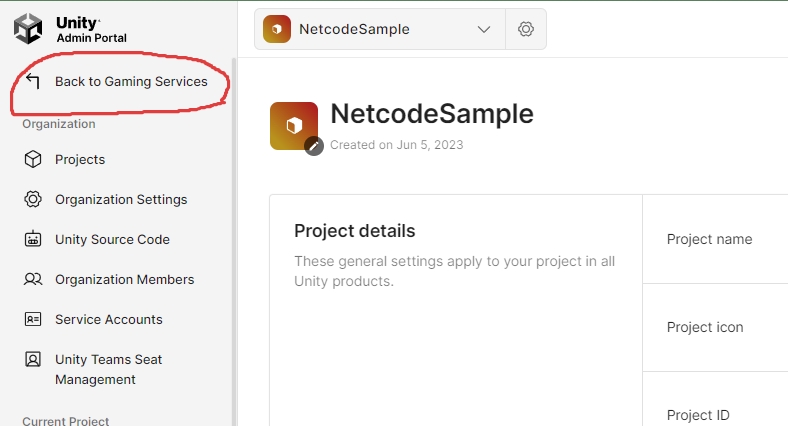
プロジェクトのリンクができたら、DashboardボタンからUnityサービスのダッシュボードページへ移動してください。ページに入ると左上の[Back to Gaming Services]ボタンを押してください。
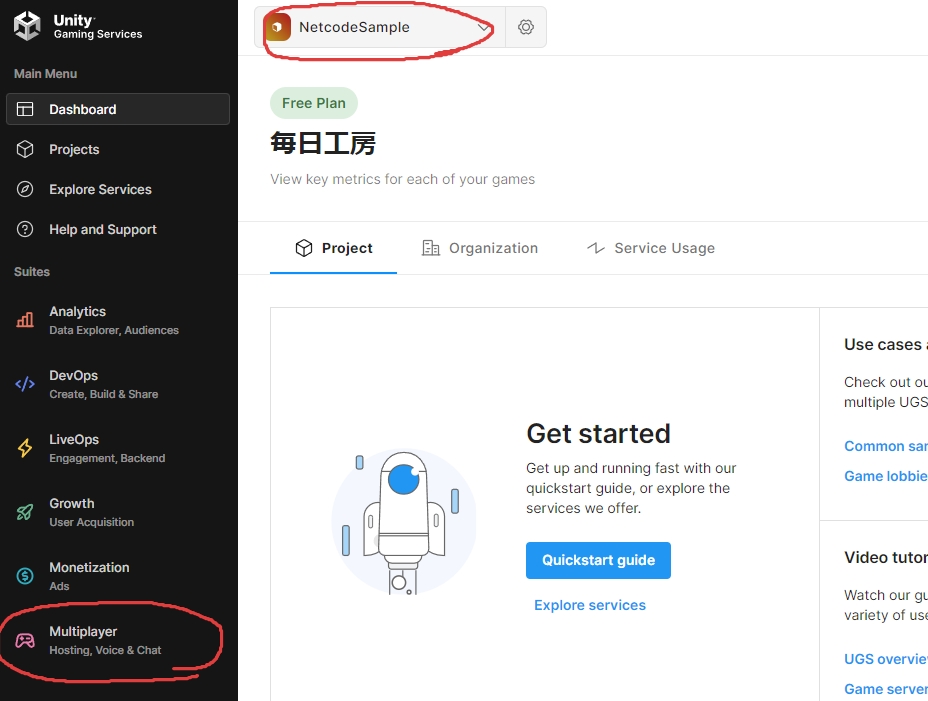
下図のようなページに移動したら、編集したいプロジェクトが選択されていることを確認し、左側のタブメニューから[Multiplayer]を選択してください。
「Multiplayer>Relay」を選択し、対応したいプロジェクトが選択されていることを確認した状態で[Get Started]ボタンを押してください。

設定自体は以上で終了!この後Setup guideが始まりますが、無視しても大丈夫です。
 スライム
スライム先にこちらの設定から来るパターンの場合、Relayのパッケージなどを入れたりするのも教えてくれます!
RelayTestスクリプト
長いけど、全部載せておきます。下のスクリプトはHost/ClientいずれかでRelayに接続するための処理が書かれています。スクリプトのポイントに関していくつか補足説明を記載します。
using UnityEngine;
using Unity.Services.Core;
using Unity.Services.Authentication;
using Unity.Services.Relay;
using Unity.Services.Relay.Models;
using Unity.Netcode;
using Unity.Netcode.Transports.UTP;
using TMPro;

public class RelayTest : MonoBehaviour
{
    [SerializeField] TMP_InputField joinCodeInput;
    private async void Start()
    {
        await UnityServices.InitializeAsync();

        AuthenticationService.Instance.SignedIn += () =>
        {
            Debug.Log("Signed In " + AuthenticationService.Instance.PlayerId);
        };
        await AuthenticationService.Instance.SignInAnonymouslyAsync();
    }

    public async void CreateRelayButton()
    {
        try
        {
            Allocation allocation = await RelayService.Instance.CreateAllocationAsync(3);
            string joinCode = await RelayService.Instance.GetJoinCodeAsync(allocation.AllocationId);

            NetworkManager.Singleton.GetComponent<UnityTransport>().SetHostRelayData(
                allocation.RelayServer.IpV4,
                (ushort)allocation.RelayServer.Port,
                allocation.AllocationIdBytes,
                allocation.Key,
                allocation.ConnectionData
                );

            Debug.Log(joinCode);
            NetworkManager.Singleton.StartHost();
        }
        catch (RelayServiceException e)
        {
            Debug.Log(e);
        }
    }

    public void JoinRelayButton()
    {
        JoinRelay(joinCodeInput.text);
    }

    public async void JoinRelay(string joinCode)
    {
        try
        {
            Debug.Log("JoinRelay code = " + joinCode);
            JoinAllocation joinAllocation = await RelayService.Instance.JoinAllocationAsync(joinCode);
            NetworkManager.Singleton.GetComponent<UnityTransport>().SetClientRelayData(
                joinAllocation.RelayServer.IpV4,
                (ushort)joinAllocation.RelayServer.Port,
                joinAllocation.AllocationIdBytes,
                joinAllocation.Key,
                joinAllocation.ConnectionData,
                joinAllocation.HostConnectionData
                );

            NetworkManager.Singleton.StartClient();
        }
        catch (RelayServiceException e)
        {
            Debug.Log(e);
        }
    }
}
スクリプトコンセプト
Startメソッドで不特定ユーザーでログインを行います。このあとボタン2つとテキスト入力を1つ作成し、CreateRelayButton/JoinRelayButtonを呼び出せるようにします。
CreateRelayではホストとしてゲームに参加します。GetJoinCodeAsyncでいわゆるルームに入るためのコードを発行します。今回はデバッグログに表示させて、目視でログインを行います。
一方クライアント側ではホストがJoinCodeを発行したのを確認したら、InputTextにコードを入力してJoinRelayButtonメソッド経由でゲームに参加を行います。
Unityに配置
空のGameObjectを作成し、RelayTestスクリプトをアタッチします。GameObjectの名前もわかりやすくRelayTestとかに変えておきましょう。
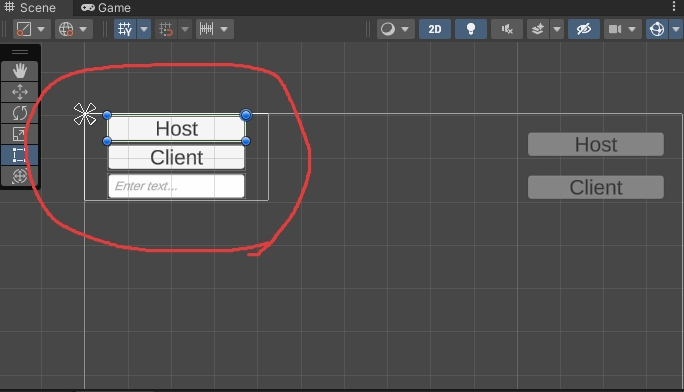
前回のプロジェクトの続きであれば、画面左上が空いているはずなので、そこにものを配置していきましょう。下図を参考にボタンを2つ、InputField(TextMeshPro版)を追加してください。
各ボタンのOnClickイベントは以下を設定。
| ボタン | メソッド |
|---|---|
| Hostボタン | RelayTest.CreateRelayButton |
| Clientボタン | RelayTest.JoinRelayButton |
OnClickに設定するGameObjectは先程作成したRelayTestをアタッチしたGameObjectです!

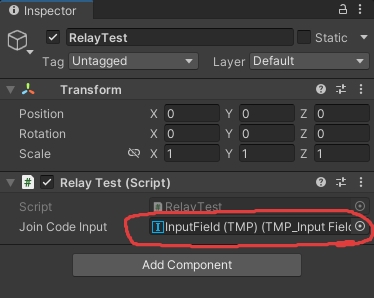
RelayTestコンポーネントにJoinCodeInputが空になっていると思うので、追加したUIのテキストインプットをセットしてください。手順通りの場合、一つだけなので右の丸ポチからセットしてもOK。
Relay Unity Transportへの切り替え
NetworkManagerゲームオブジェクトに一緒に貼りつているUnityTransportコンポーネントのProtcol Typeを[Relay Unity Transport]に変更します。
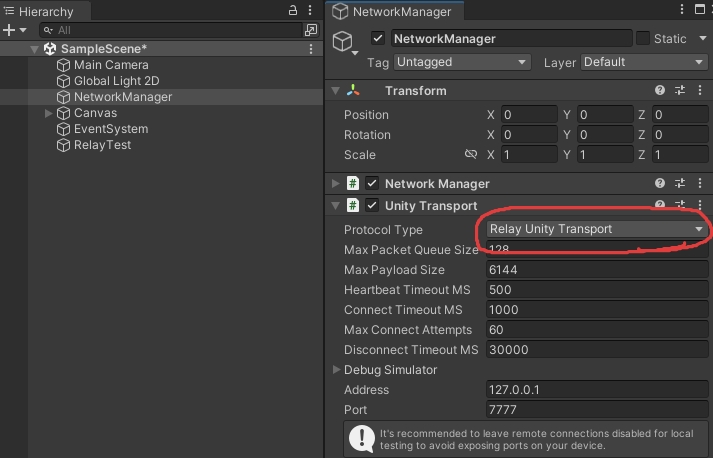
わざわざ1セクション用意したけど、これだけ!
実際に動かしてみた
今回の実行ではUnityエディタ側がホストになる必要があります。JoinCodeをデバッグログに表示するようにしているためです。
- クライアント用アプリを立ち上げて待つ
- Unityエディタ側も起動(この2つは順序逆転してもOK)
- Unityエディタ側のHostボタンを押す
- デバッグログにJoinCodeが表示されるのを確認
- アプリ側のInputTextにJoinCodeを入力し、Clientボタンを押す
- お互いに接続されたことを確認。キャラクター動かしたりして見てください
コメント
コメント一覧 (1件)
[…] リレーRelay機能を使って、マルチプレイ環境を作る![Unity+Netcode for GameObject… 「Netcode for […]